
Bicycle hoop spacing: check the occupied layout
Plan bicycle hoop spacing with parked bikes in place: distinguish centre spacing, vehicle overhangs and locking access using the correct product drawing.
- ByRollerstop editorial team
- Published
- 7 min read

Key points
- Hoop width, centre spacing and clear spacing describe different dimensions.
- Use the drawing for the exact fixing and tube variant selected.
- Test locking and removal with neighbouring spaces occupied.
- Older guides provide dated technical orientation, not universal current legal advice.
Usable spacing between bicycle hoops cannot be established from the width of the hoop alone. Check the exact fixing variant, the distance between hoop planes, the occupied bicycle envelopes and access for locking together. For architects and urban planners, a layout showing parked bicycles is therefore more useful than a row of empty stand symbols. A figure taken from a guide does not replace this assessment or a project-specific check of local requirements.
Schematic illustration. Not a dimensional drawing or a real reference installation.
Define what the spacing dimension measures
Start by identifying the distance you are dimensioning. Hoop width describes the extent within the plane of the hoop. Row centre spacing describes the distance between neighbouring hoop planes. Clear spacing is the remaining gap between the actual surfaces of the components. These dimensions answer different questions and should not be presented under the same label on a drawing.
Occupancy adds another layer. A bicycle leans alongside the hoop, with its wheels extending beyond the hoop outline. Handlebars, pedals, baskets and bags change the space occupied. A clear gap between steel tubes does not demonstrate that a bicycle can be parked or locked conveniently. Draw the intended bicycles and identify the measuring points so that the client, designer and installer can discuss the same geometry.
Also state whether you are assuming use on one or both sides. If both sides of a hoop are to be used, drawing a bicycle on just one side is insufficient. Show how neighbouring users can reach their frames and locks without first moving another bicycle. This is a question to test against the proposed occupancy, not an unconditional promise of parking capacity.
Read older guidance in its original context
The quality criteria published by Nachhaltiges Beschaffungsservice NÖ, dated May 2016, refer on pages 6 and 11 to distances of 0.8 to 1.2 metres between individual bicycle hoops. The recommendation concerns access and avoiding damage while parking. It is not a statement of current law applicable everywhere. In particular, do not silently add a precise measurement convention if the guide does not clearly establish it for your layout.
The ADFC Bayern planning guide, dated December 2018, discusses lateral spacing between parked bicycles in different row parking systems. Pages 2 to 5 distinguish arrangements with and without staggered wheel heights. That distinction matters: bicycle spacing in a guided row system is not automatically the centre spacing of independently installed leaning hoops. Do not copy an isolated figure without its associated parking configuration.
Both documents are used here as specialist guidance with their dates explicitly identified. They are not treated as evidence of the current version of a standard or of local building obligations. Check current project requirements separately and assess the proposed arrangement against the actual product drawings. Bicycle recommendations are not universal minimum dimensions for kick-scooter parking systems either.
Use the drawing for the exact BERLIN variant
The BERLIN leaning hoop is available with different fixing options. Use the drawing associated with the chosen version when developing the layout. The publicly available bolt-down drawing for the 42.4 millimetre tube shows a hoop width of 1200 millimetres and a height of 900 millimetres above the indicated ground level. These are dimensions in the sample drawing dated October 2026, not a general spacing rule.
The width is measured within the hoop plane. It does not specify the required distance to the next parallel hoop. Equally, the illustrated height says nothing about lateral operating space. The drawing distinguishes views and fixing details and notes that the position in space must be checked for the site. Preserve that distinction when preparing the project layout.
There is a separate foundation drawing for the concrete-in version. It identifies ground level, below-ground components and other height references. Do not use the overall height of an embedded component as its visible height above the finished surface. This article does not derive foundation sizing or fixing selection from a sample drawing. The planning documents and information about foundations and installation help you assemble the relevant material for project coordination.
Test the row with bicycles in place
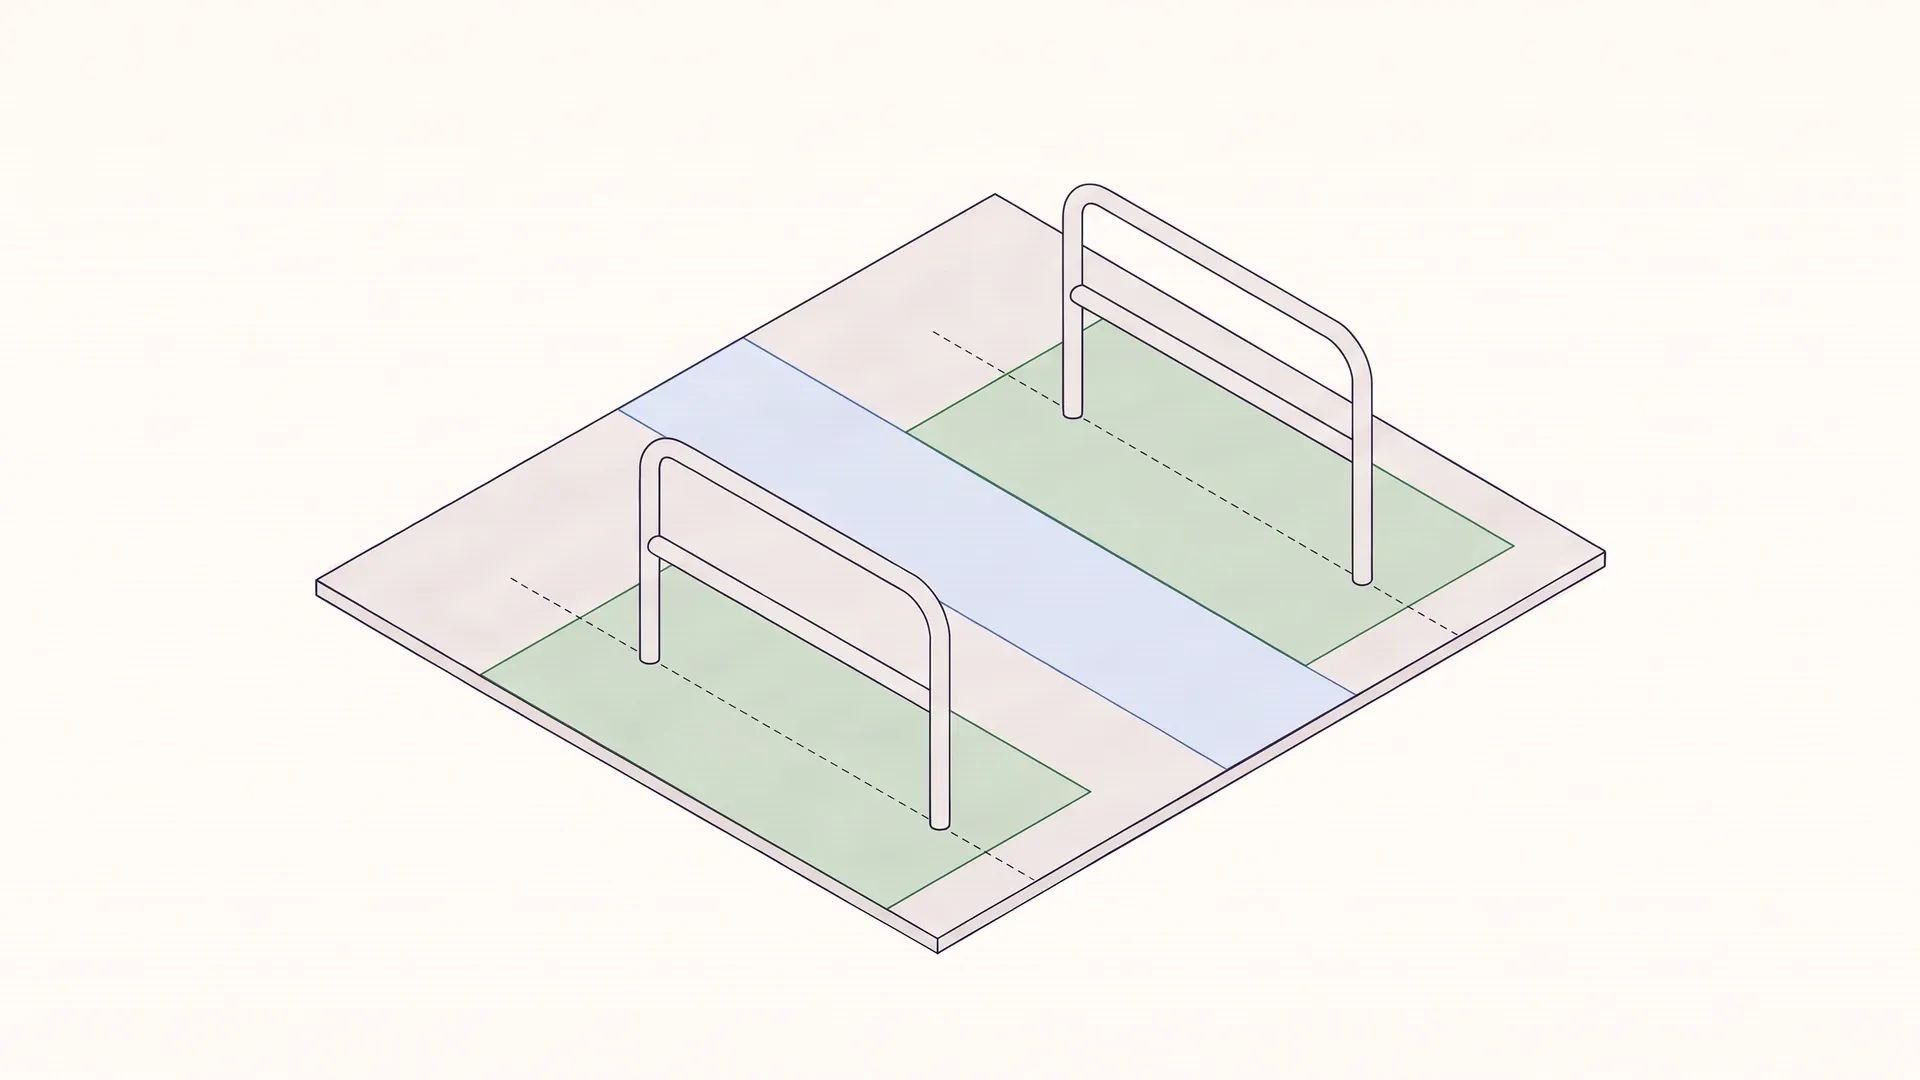
Schematic illustration. Not a dimensional drawing or a real reference installation.
Green indicates allocated parking areas and blue a separate access zone. The dashed lines are schematic reference lines. This illustration establishes neither an acceptable centre spacing nor sufficient bicycle space; these need to be demonstrated in the scaled project layout.
Begin with an occupancy scenario typical of the site. Include bicycle outlines, handlebars and overhangs, rather than steel components alone. Add the expected features, such as child seats or panniers. Ask the operator to confirm the assumed vehicle mix instead of inferring demand solely from the width of the available land.
Then check the sequence of use. A bicycle is wheeled to a free position, placed beside the hoop, locked through its frame and later removed. Can that sequence still take place when neighbouring spaces are occupied? Is the locking point reachable? Does removing the bicycle require swinging it into a through route? Record these conflicts and adjust the layout rather than concealing them behind a higher nominal capacity.
The ADFC guide notes that excessively tight lateral spacing can leave some planned spaces unusable. It also explains that basic leaning hoops do not reliably prevent an unlocked bicycle from rolling or falling and that two-sided use can cause conflicts. Assess placement and handling before locking, not only the final locked position. The illustration is not evidence of tested protection against tipping.
Check row ends and access separately
A repeating internal position says little about the beginning or end of the row. Beside a wall, handlebars or the act of using a lock may require additional space. Next to a door, draw its actual opening area. Apply the same occupied-layout check to bollards, columns, planting and drainage details. The question is not merely whether the hoop itself fits.
Distinguish parking, through movement and manoeuvring on the drawing. Do not count a route for circulation as permanently occupied bicycle space at the same time. Work with the responsible designers to identify the movement areas that need to remain available on the site. No general legal minimum for those areas is inferred here from the older guides. Proximity to an entrance does not justify narrowing a required access route.
For a possible extension, test the eventual occupied arrangement too. An empty strip next to the row is only a useful reserve if additional hoops do not consume the access space. After commissioning, review actual parking behaviour with the operator. Repeated parking in the gaps may be a reason to revisit the vehicle assumptions and arrangement rather than immediately treating it as an issue of user discipline.
Prepare a traceable coordination package
A useful enquiry package contains the site plan, the chosen hoop and fixing variant, bicycle outlines, the intended sides of use, and marked access areas and conflict points. Add photographs of the existing site, visible obstacles and outstanding questions about the substrate. Identify who will approve the layout and who will inspect the facility during operation. This makes it clear which assumptions have been checked and which remain open.
With this information, you can request a quotation and discuss the appropriate BERLIN version and associated planning documents with Rollerstop for your project.
Frequently asked questions
How far apart should bicycle hoops be?
Usable spacing depends on layout, occupancy and bicycle geometry. The NÖ guide dated May 2016 recommends 0.8 to 1.2 metres between hoops. This is not a universal current legal rule and does not replace an occupied project layout.
Is hoop width the same as row spacing?
No. Hoop width is measured within the hoop plane, while row spacing is measured between neighbouring hoop planes. Bicycle footprints and access to locks must be considered as well.
Which BERLIN drawing should be used?
Use the document for the chosen fixing and tube variant. Separate sample drawings cover bolt‑down and concrete‑in versions and use different height references.
Can bicycle spacing be applied to kick scooters?
It cannot be transferred as a blanket rule. Scooter retention, vehicle geometry, locking arrangements and access need to be checked for the particular system.
Sources
- Qualitätskriterien Radabstellanlagen und Fahrradständer (inkl. Scooter), Stand Mai 2016, Nachhaltiges Beschaffungsservice NÖ / RADLand NÖ
- Hinweise für die Planung von Fahrrad-Abstellanlagen, Stand Dezember 2018, ADFC Bayern
- BERLIN – Anlehnbügel aus Rundrohr, Rollerstop
- Anlehnbügel BERLIN Ø 42,4 mm – Montagezeichnung zum Aufschrauben, Stand 10/2026, Rollerstop
- Anlehnbügel BERLIN Ø 42,4 mm – Fundamentzeichnung zum Einbetonieren, Stand 10/2026, Rollerstop
Matching products

Read more
 Planning & space requirements
Bicycle parking: planning footprints and access space
Separate stand dimensions, parked bicycle footprints and manoeuvring space when planning bicycle parking. With source comparisons and a project checklist.
7 min read
 Planning & space requirements
Retrofitting parking at apartment buildings
Plan a bicycle parking retrofit for your apartment building by combining resident demand, existing space, vehicle types and clear operating responsibilities.
7 min read